pyChai - Parameter Mapper
A documented journey of development of pyChai - Parameter Mapper extension using pyRevit for Autodesk Revit.
Introduction
The blog is a personal reflection of my journey during the development of plugin, from ideation to final form of Parameter Mapper tool.
| Name | Parameter Mapper |
|---|---|
| Gist | Apply instance parameter values on Revit elements from spreadsheet (Excel/LibreOffice Calc/CSV) file. |
| Support | Revit 2020 - 2027 |
| Install | Click here for install instructions. |
| Additional | Read notes for optimal functioning of tool. |


Backdrop
2 years ago, I was working as a Junior BIM Architect in a firm. The requirement for the project I was working on involved data entry and validation of COBIE data from an Excel file provided by the client. We had to manually fill all the data from the given Excel file into the Revit model, which took me 3 days (manual typing/copy-paste), making it a mundane and tiring task.
I had just started exploring pyRevit and its shipped extensions, but disappoint hit me, that no ready-made script or solution existed. I tried using ChatGPT, but it was not a productive, wasting 2-3 hours doing empty-minded debugging, which was exhausting (and my lack of Python fundamentals made it more frustrating). I also tried using Dynamo, but I failed. Eventually, I had to do the work manually.
This ignited a spark in me to learn Python properly, focusing on fundamentals (and not relying on ChatGPT for help). I started making a list of tasks that required some form of automation on my part.
So, after a year, I noticed something - almost every project required some form of data-entry tasks, either filling the door schedule or populating parameters. It presented a perfect opportunity for me to make an automation script using Python. By then, I had a fairly basic idea about pyRevit and Python, thanks to Erik Frits and Gavin Crump.
Brainstorm
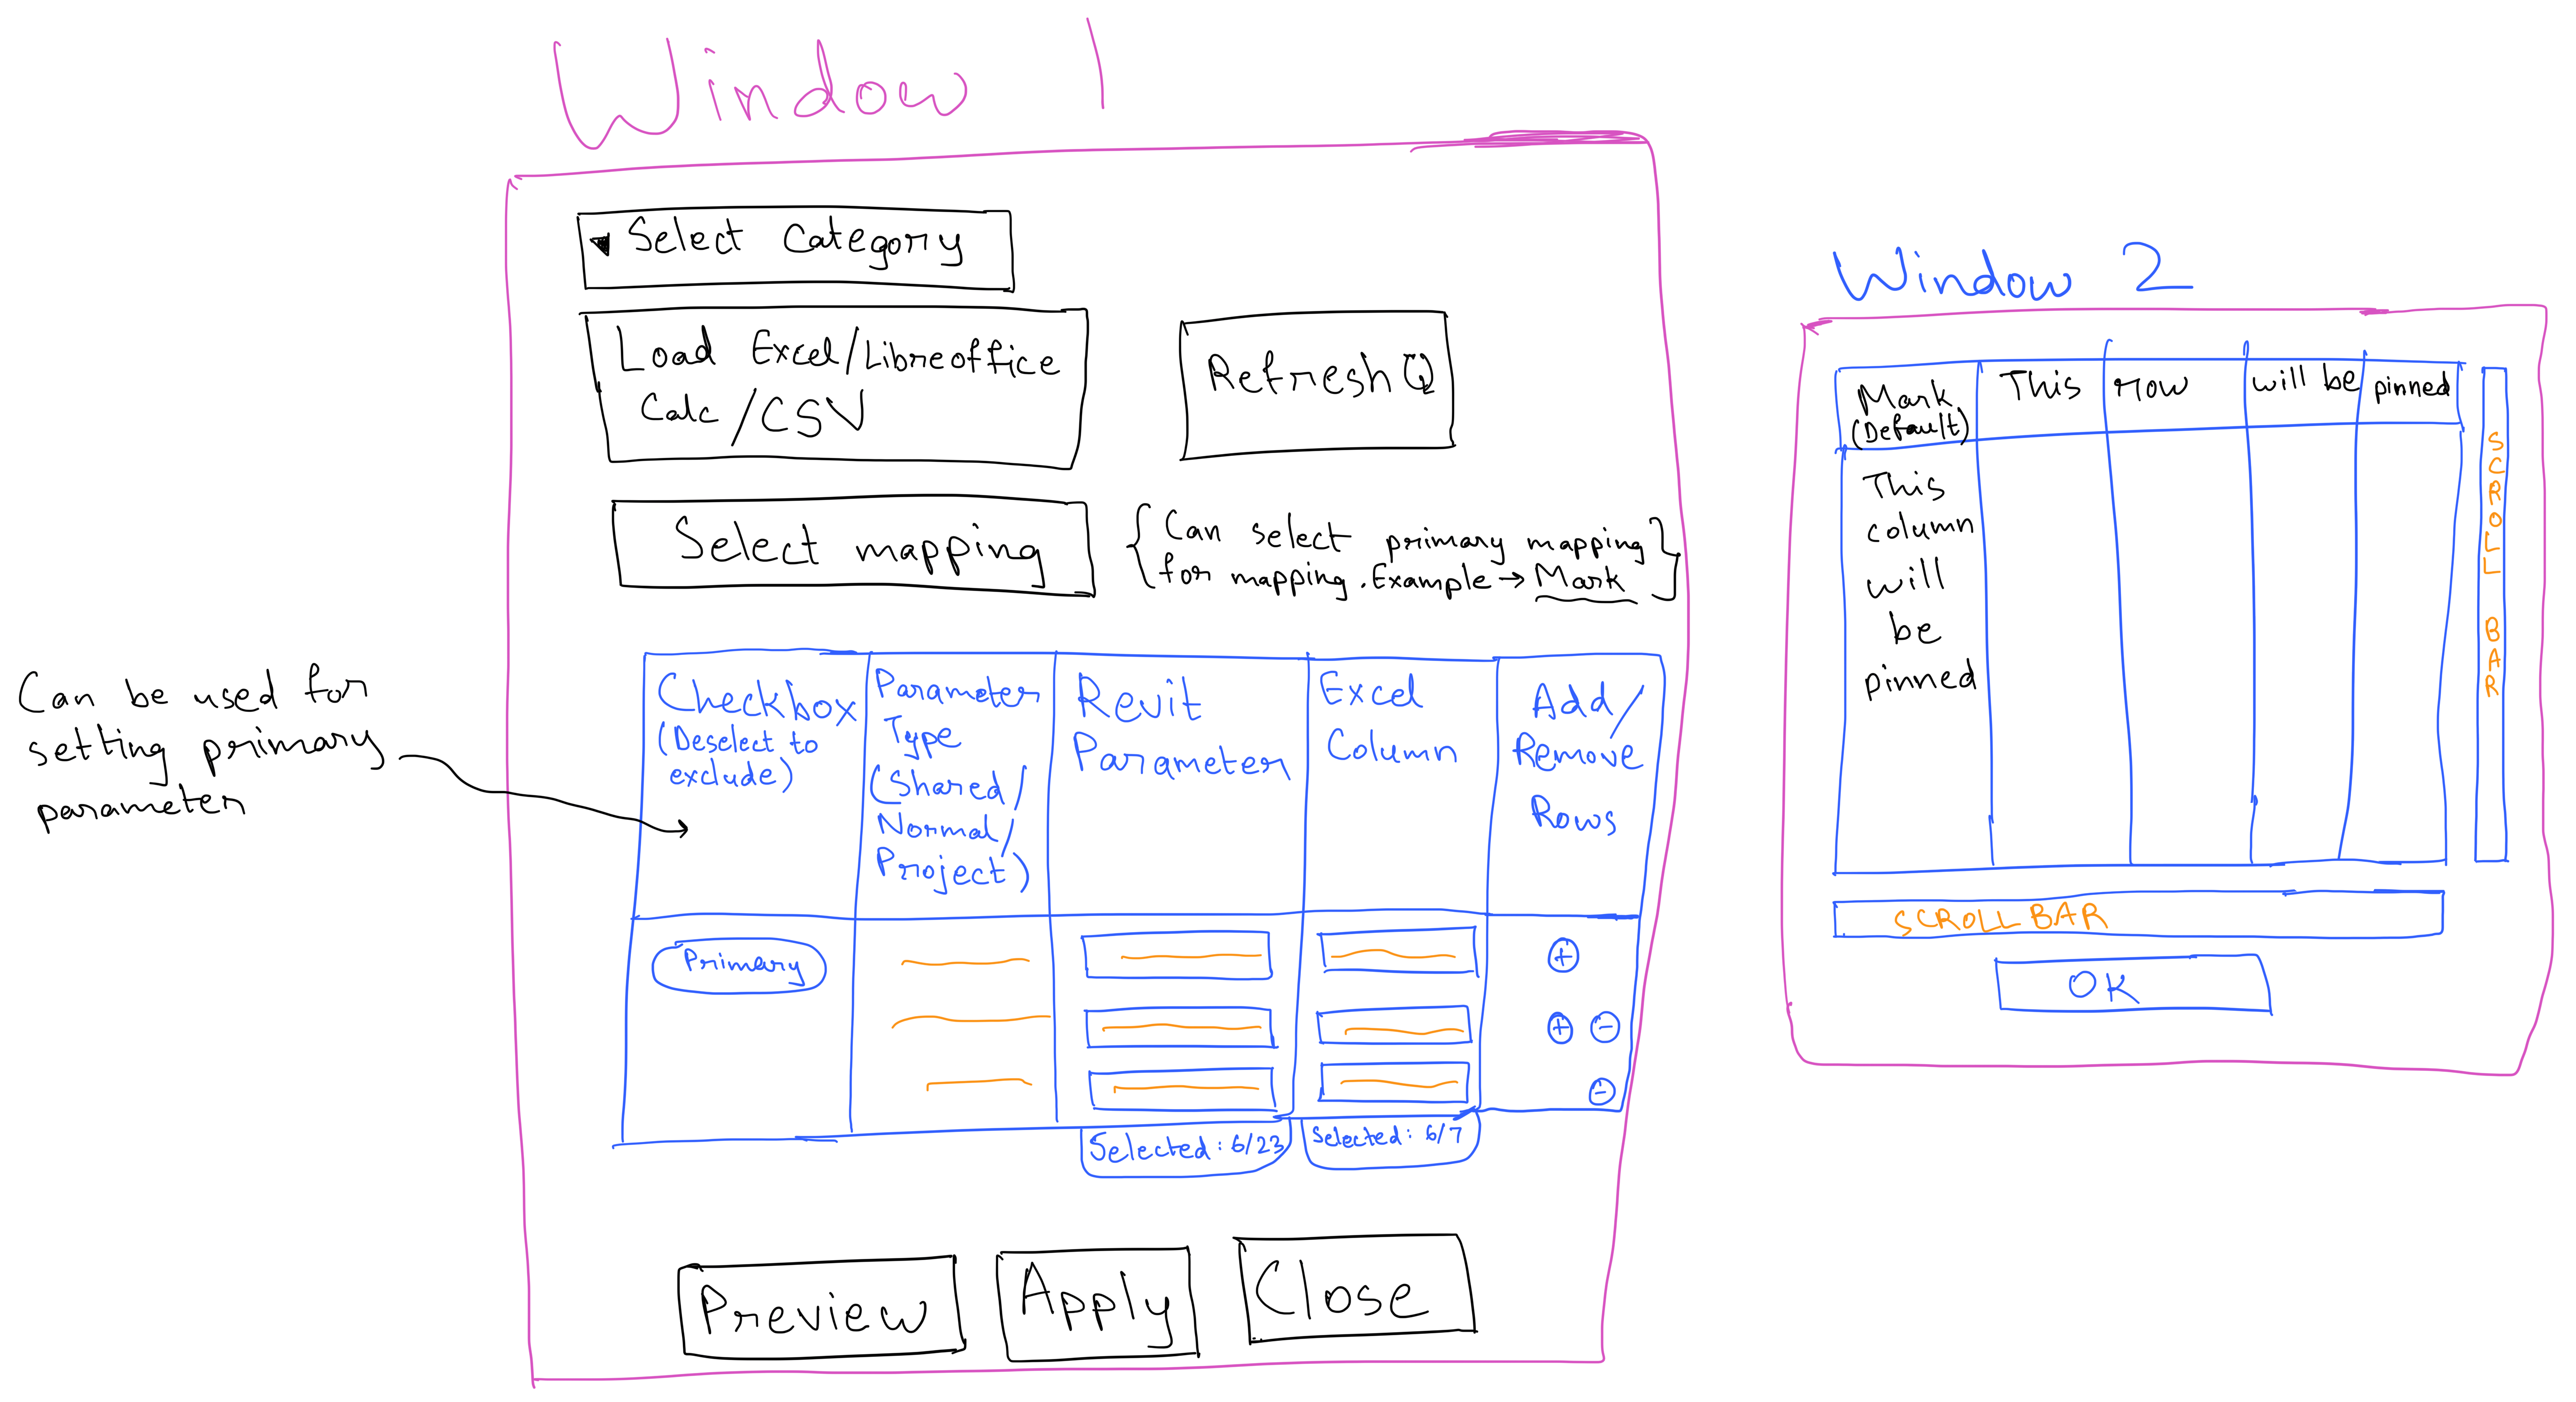
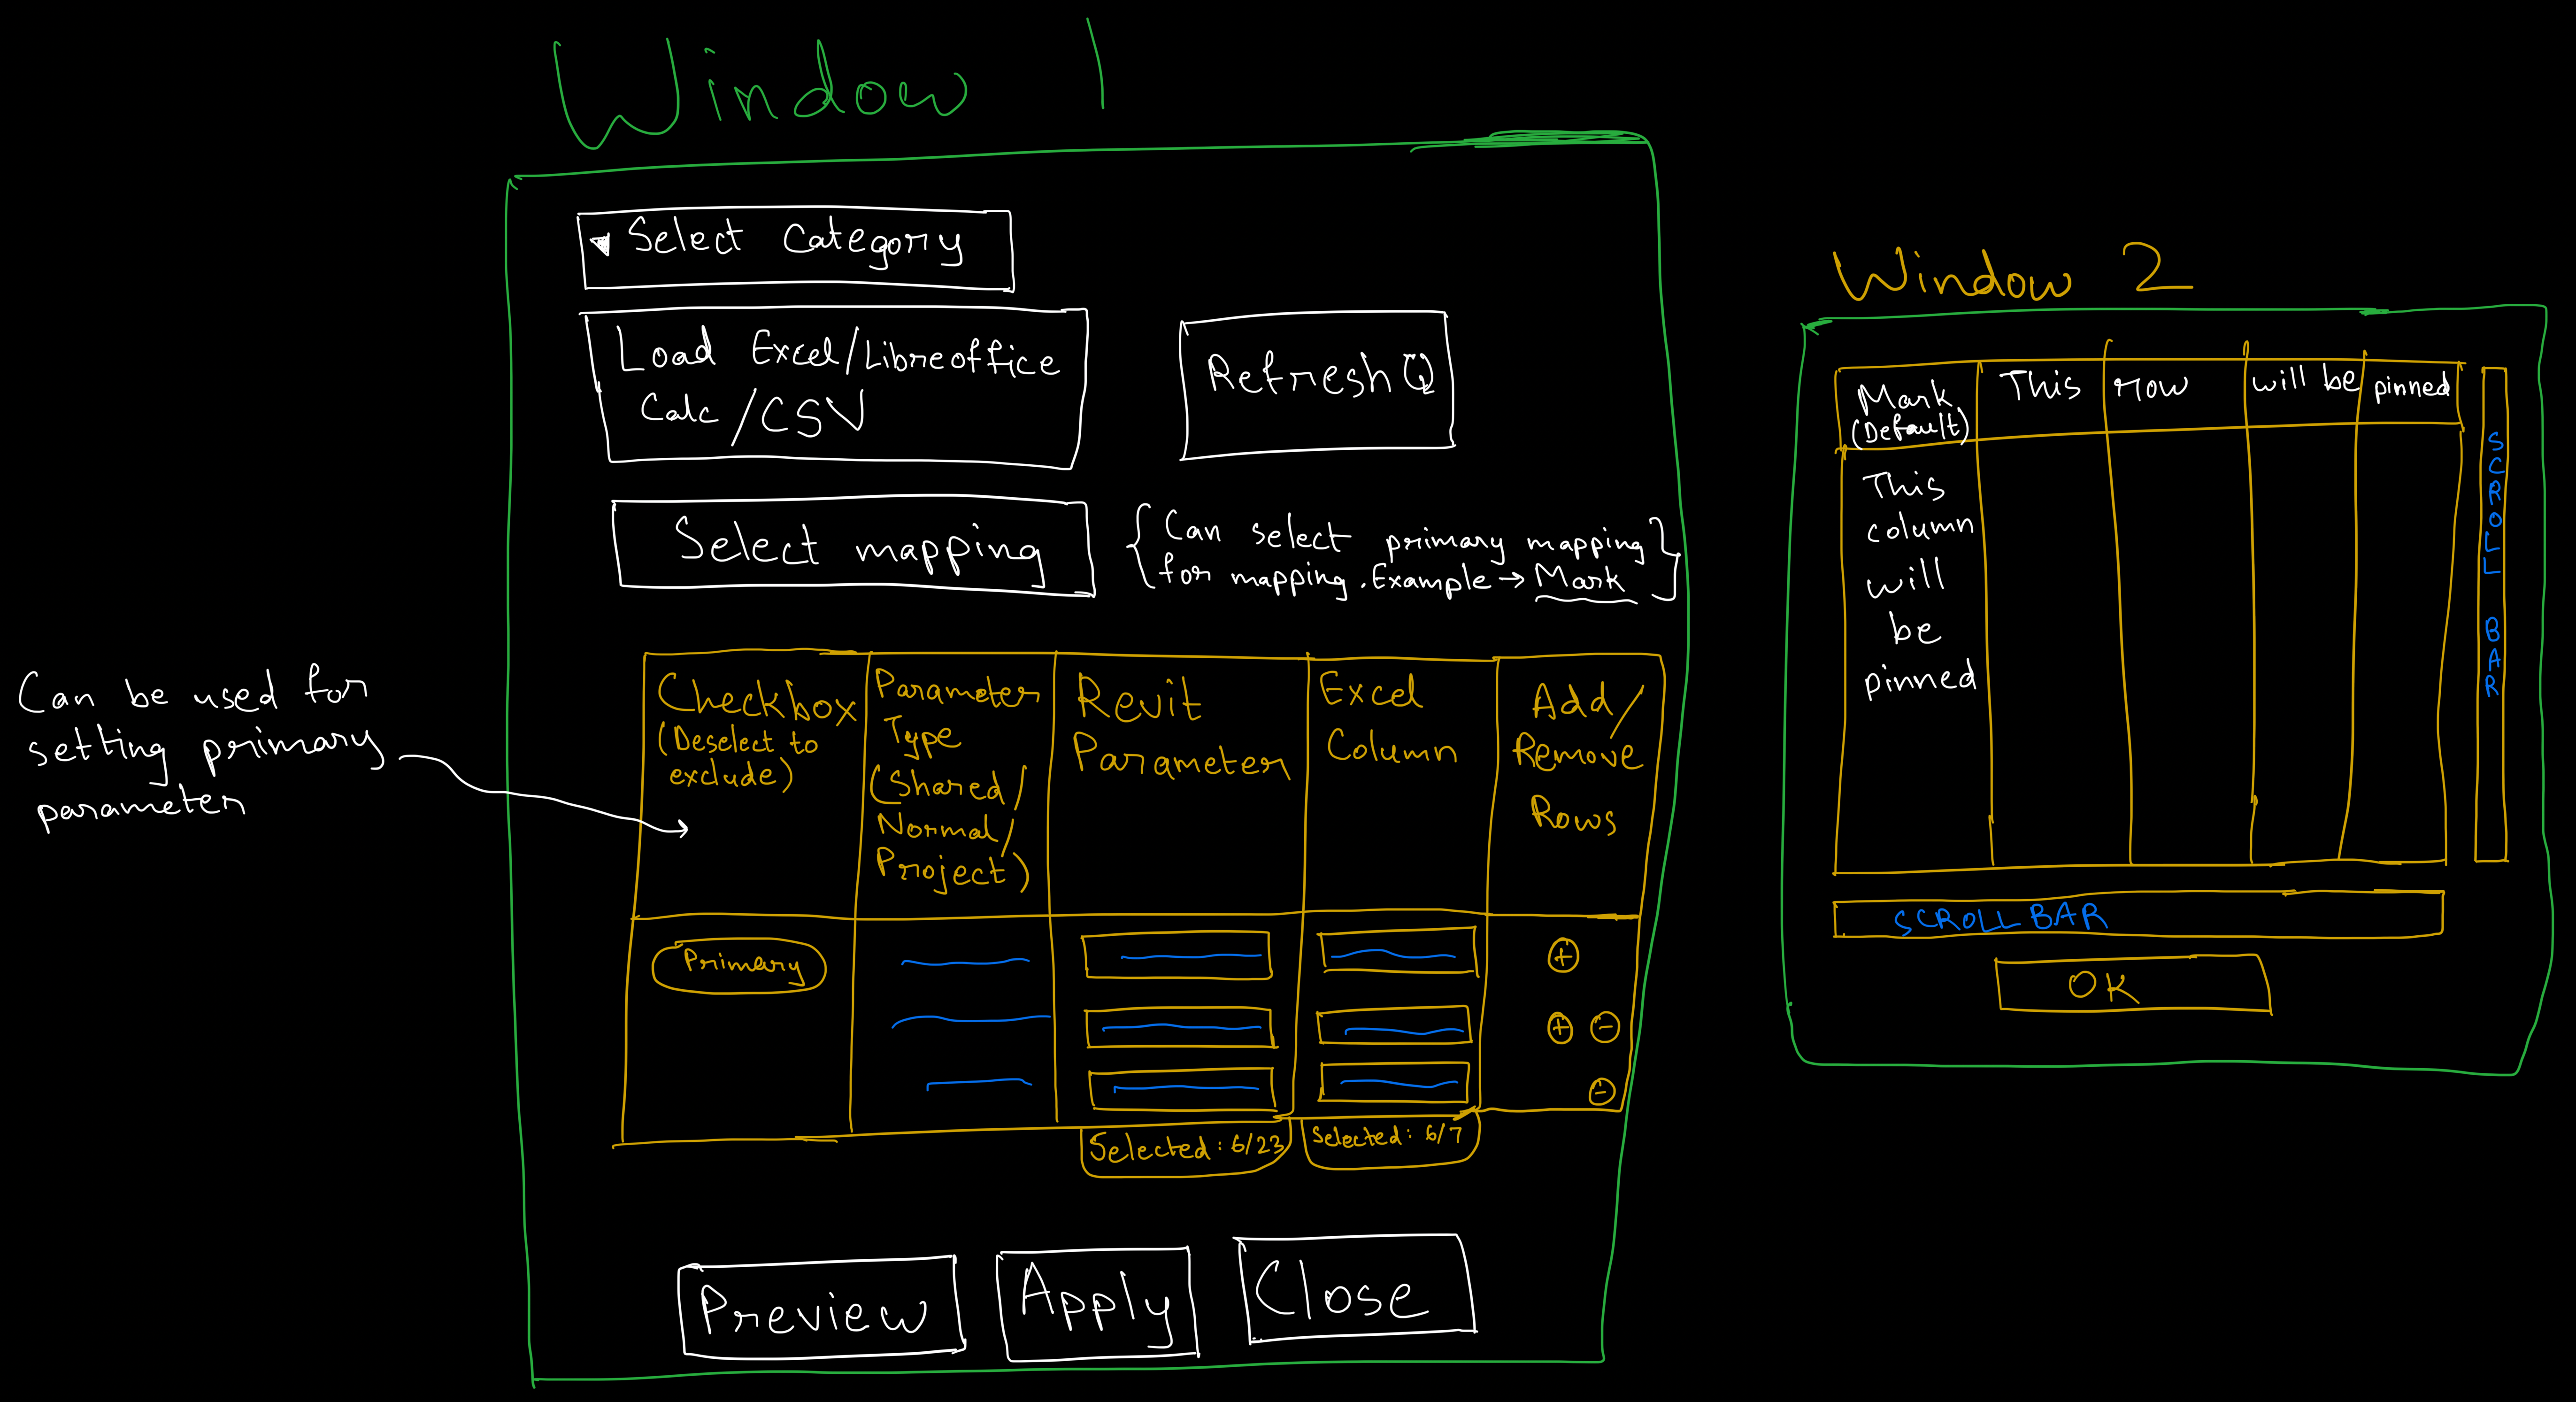 Image 01 - Initial sketch idea of
 Parameter Mapper tool
The brainstorming of my initial idea spiraled into the sketch seen above. My previous attempt at learning C# introduced me to OOPs concept, wanting to try implementing it using Python. Therefore, the project’s base was decided to be implementation of IronPython 2.7 and WPF with MVVM architecture.
Development
Tech stack
The development of pyChai plugin involved following tools -
| Tool | Purpose |
|---|---|
| WPF | Framework for plugin UI |
| Python | Primary language for plugin full stack |
| Git | Version Control System |
| Adobe Illustrator | Icon Design |
| Figma | Initial sketch to mockup prototype |
| Obsidian | Markdown-based documentation |
| Visual Studio 2022 Community Edition | IDE for WPF XAML |
| pyCharm, VSCode | IDE for Python |
| Mermaid.js | Diagram and flowchart creation |
| Davinci Resolve | Video editor |
Icon design

Image 02 - pyChai logo

Image 03 - Parameter Mapper logo
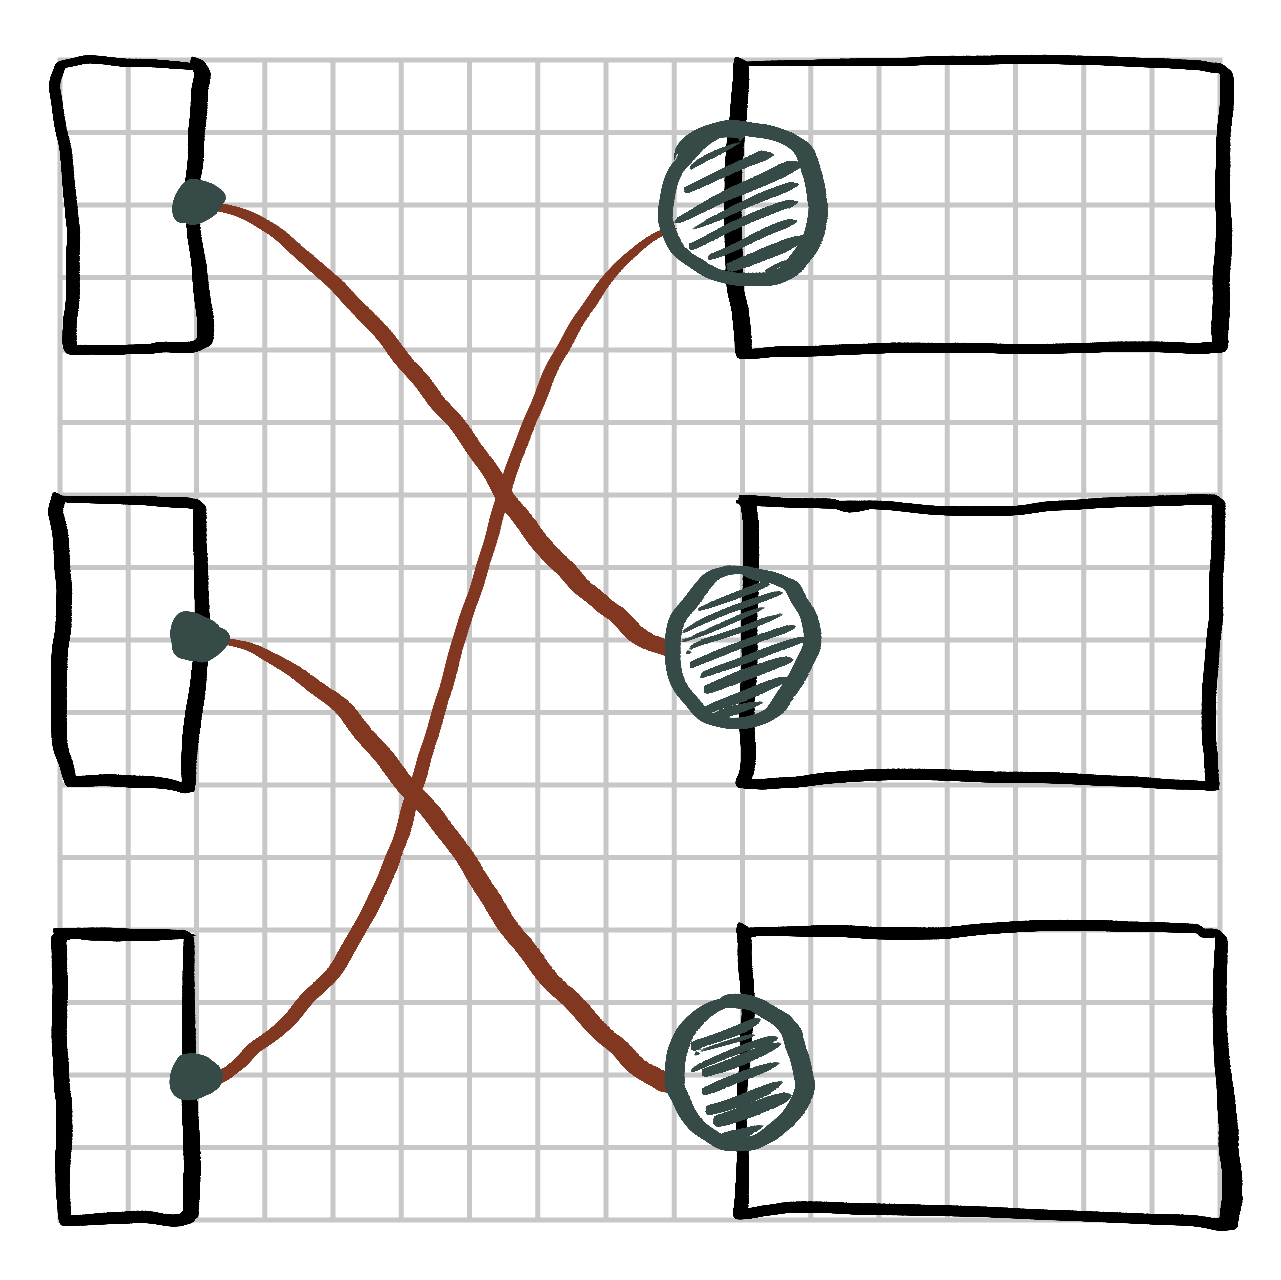
Image 04 - Parameter Mapper logo (Wireframe sketch)
Chai is a way of life in India. Chai tea (pardon the “tea tea” redundancy !😶🌫️) is a warm, sweet drink made from black tea, milk, water, and fragrant spices. I love Chai !🍵, naturally the inspiration behind the name of extension along with pyChai logo. The logo represents a glass cup filled with Chai, showing the smoky aroma ascending from it.
The inspiration behind the “Parameter Mapper” tool’s logo is the connection of nodes, similar to Dynamo/Grasshopper.
Color palette
 Image 05 - Kulhad Chai The Chai in a Kulhad (an earthy clay cup) was chosen as a base for color palette, radiating a warmth in colors.
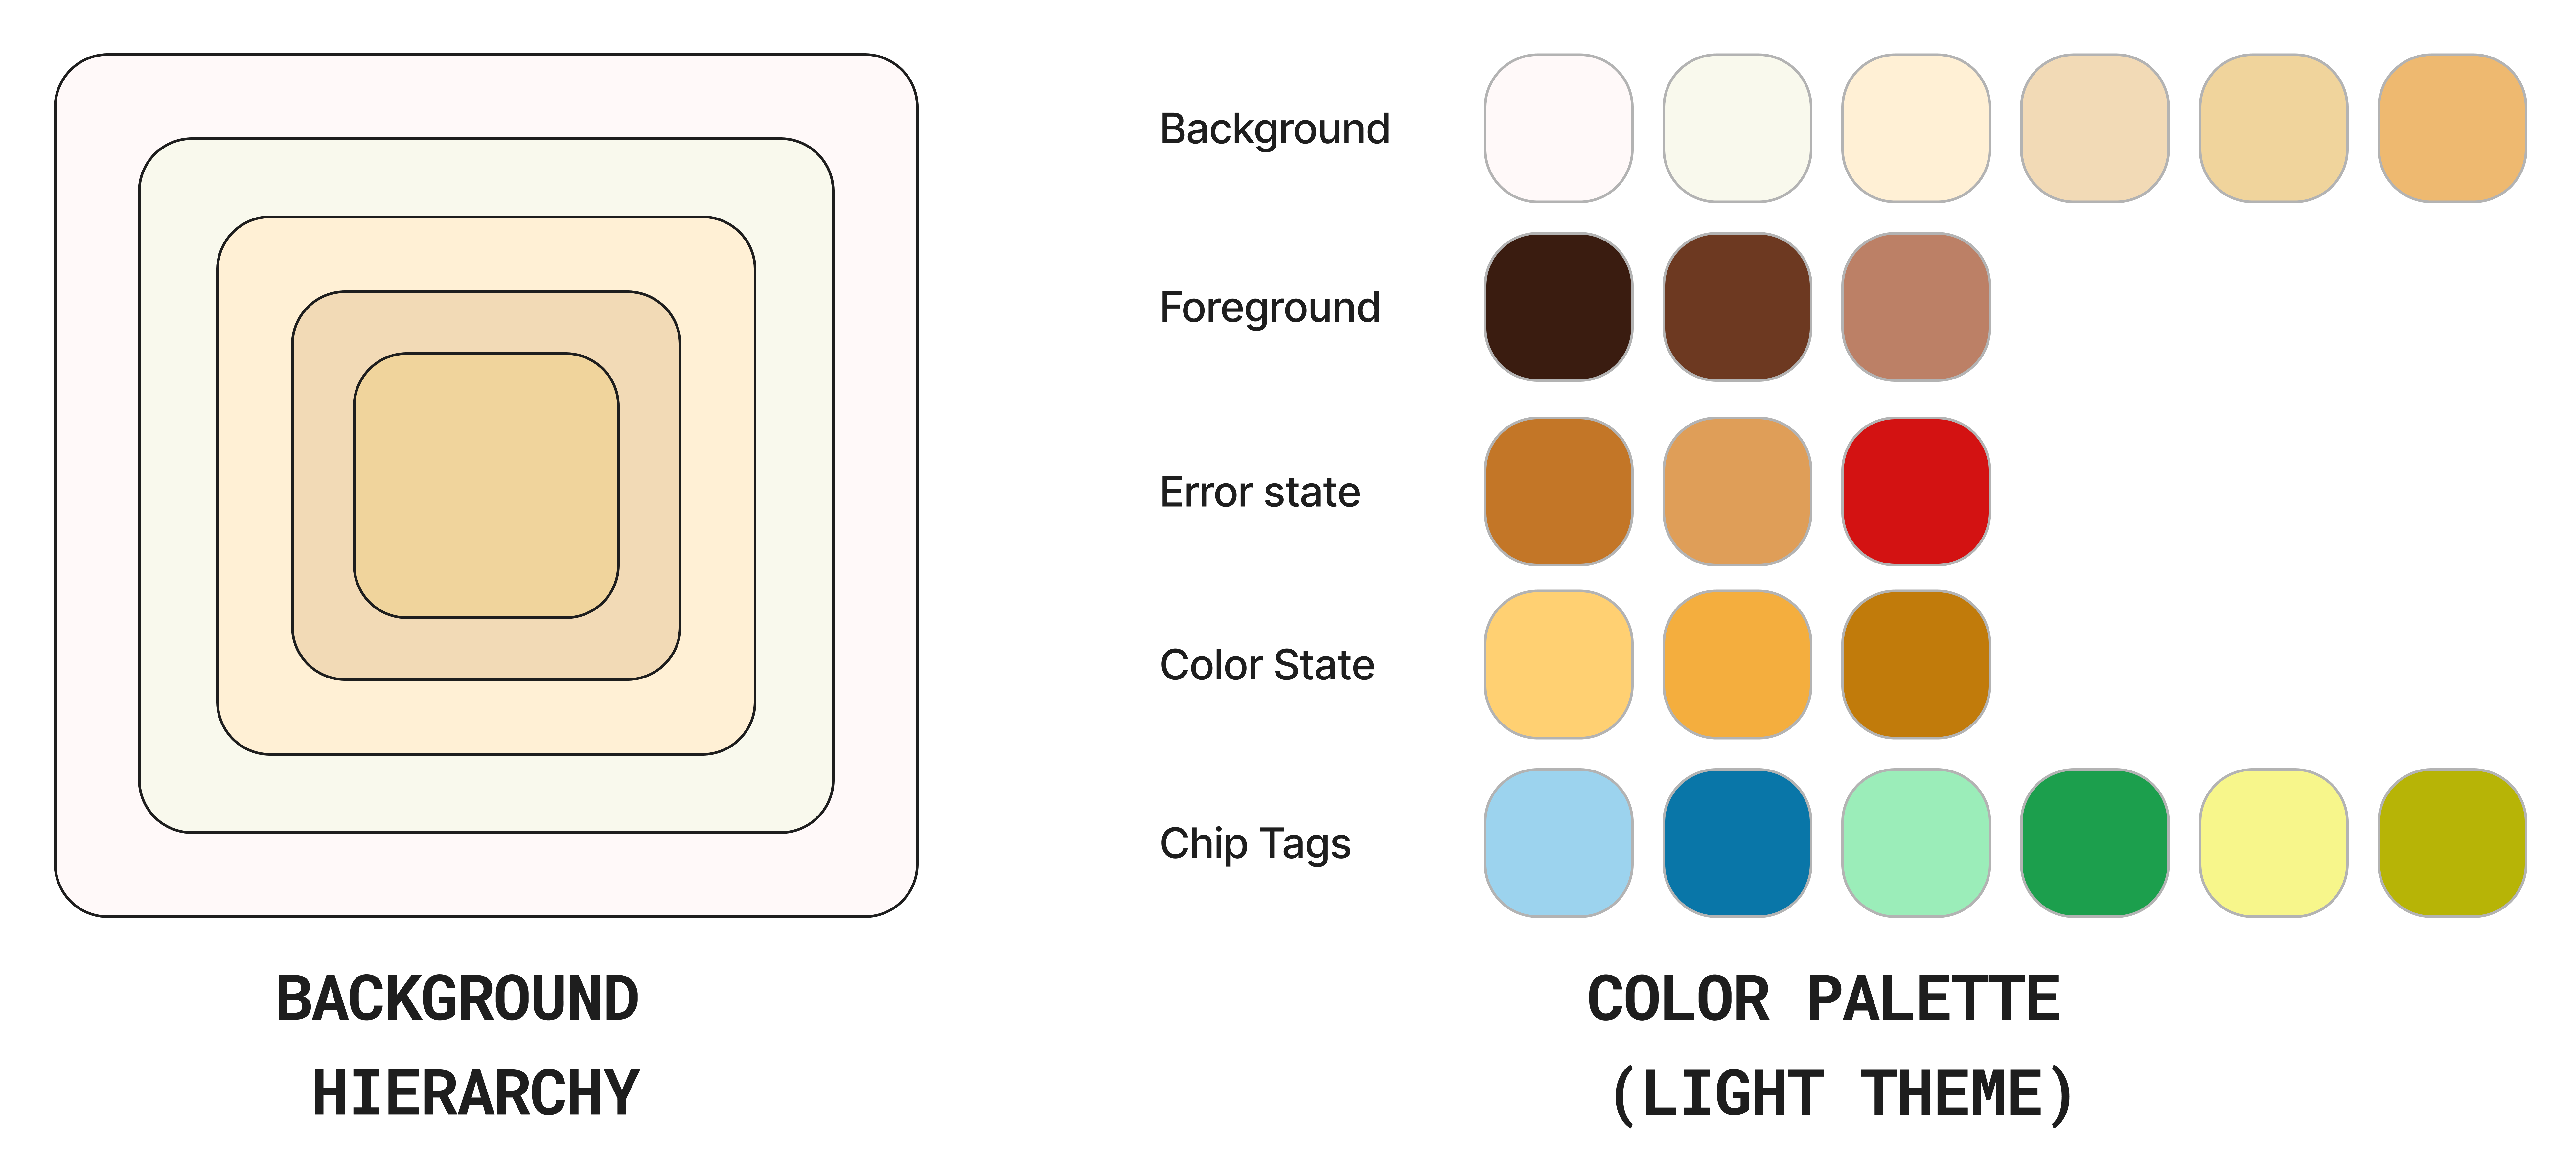 Image 06 - Color palette (light theme)
Initial Prototype
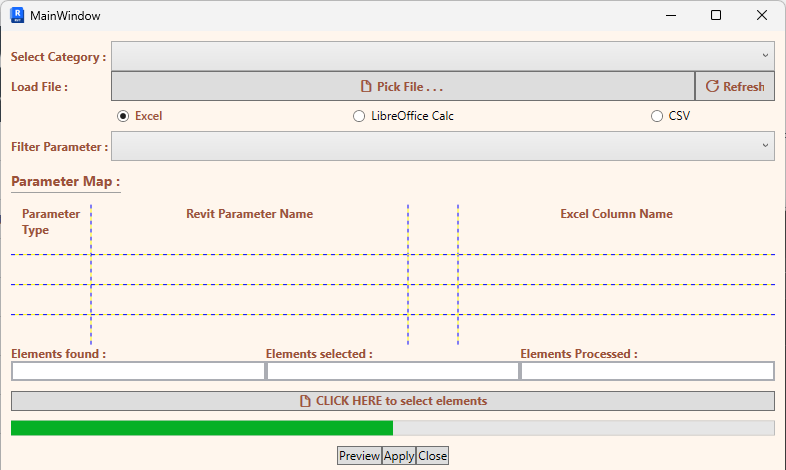 Image 07 - Translating sketch to WPF prototype
The initial form-building of sketch to a working prototype of WPF XAML filled me with ecstasy. But somewhere in my vision, it left a lot to be desired in terms of visual appearance.
So, I started looking for WPF-based UI design inspiration. On the way, I stumbled upon the WPF UI, a fluent modern WPF library. When I saw that ricaun (whom I have been lurking from past year), it reinvigorated my feeling of taking deep-dive in the code base. I am glad I studied the codebase; I learned more about WPF, UI styling, code organization, the MVVM approach and some magical things using code-behind, especially window maximize/restore.
Final Product
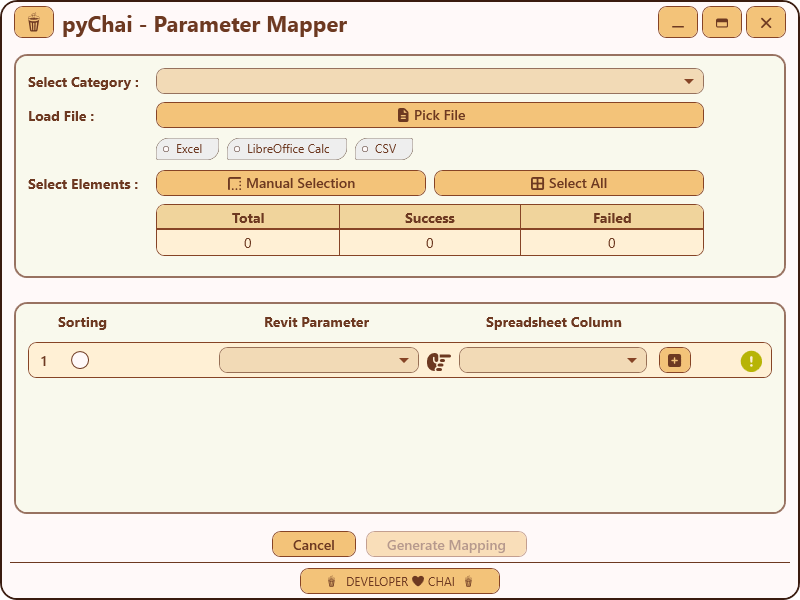 Image 08 - Parameter Mapper : Main Window
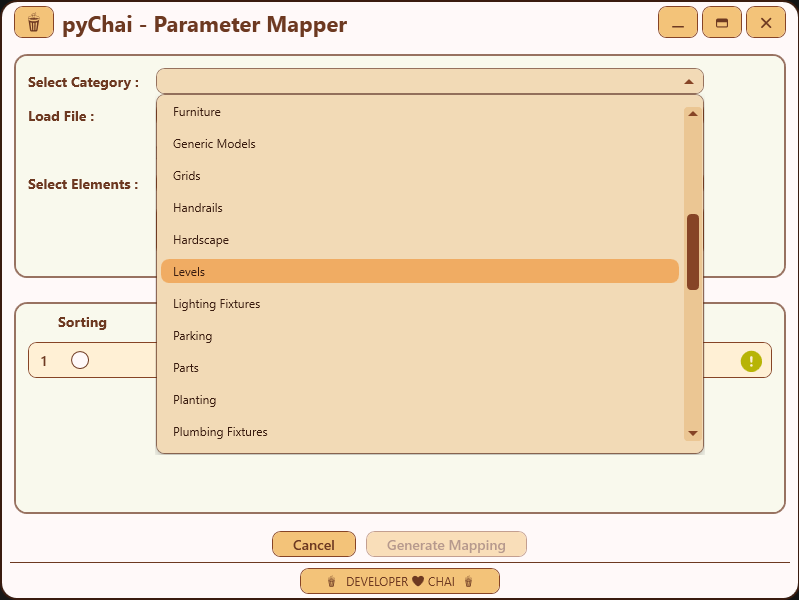 Image 09 - Parameter Mapper : Drop-down selection
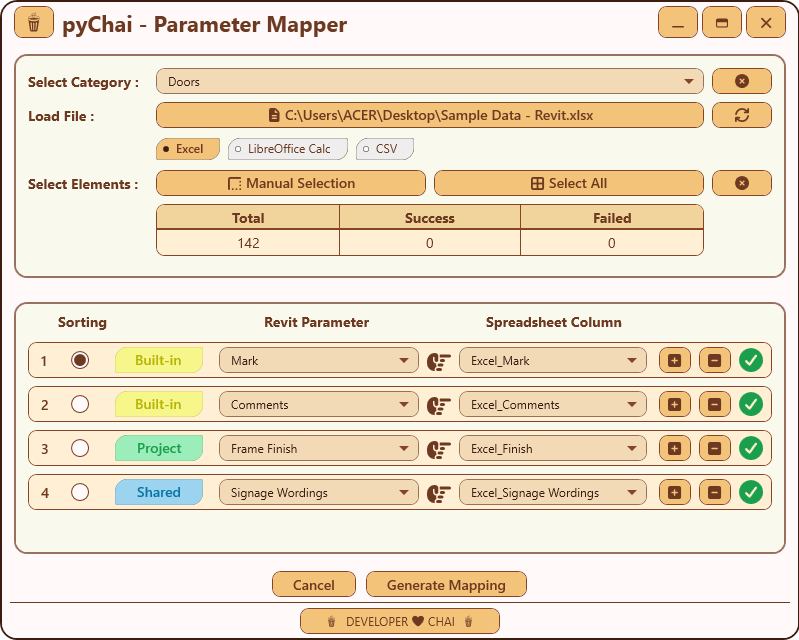 Image 10 - Parameter Mapper : Mapping Revit instance parameters with spreadsheet columns
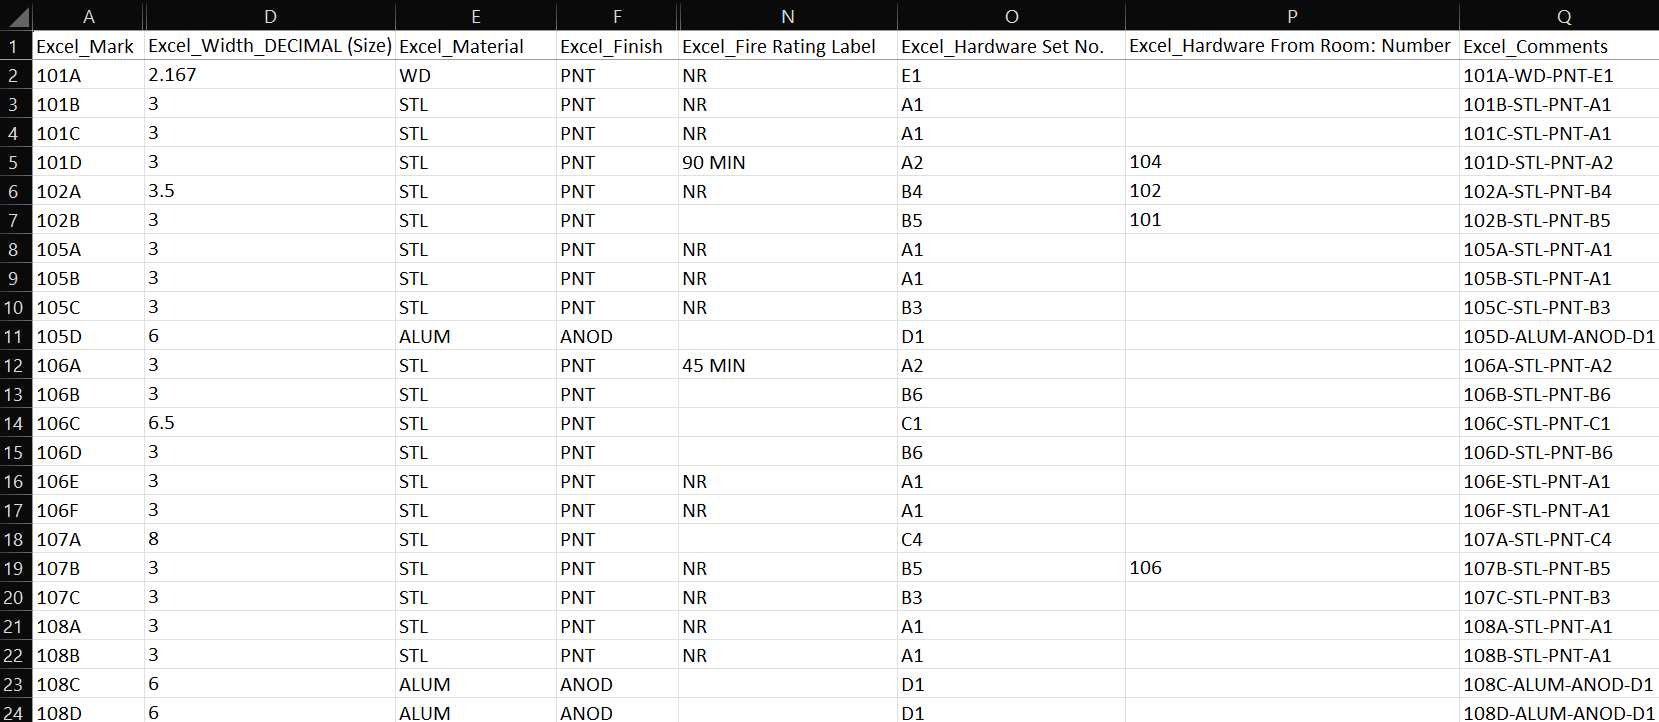 Image 11 - Parameter Mapper : An Excel file with a header row
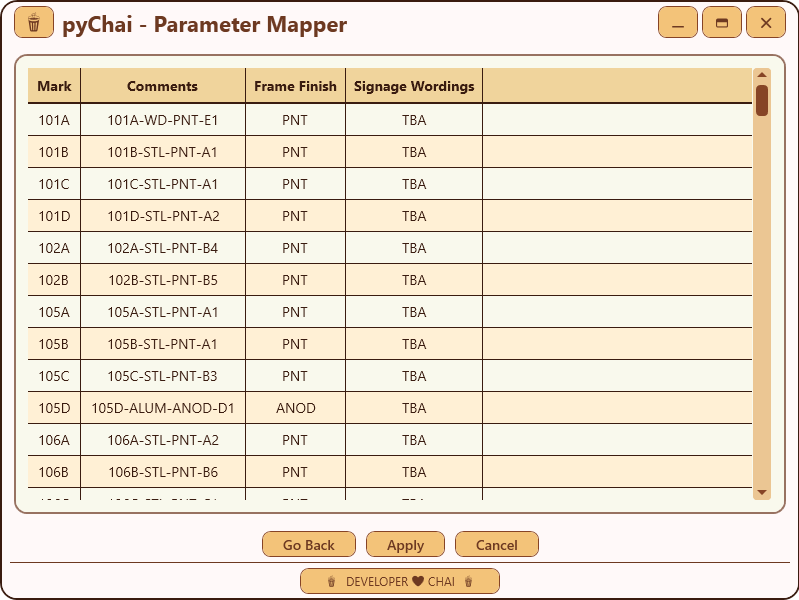 Image 12 - Parameter Mapper : Preview Window showing preview of mapped elements with values
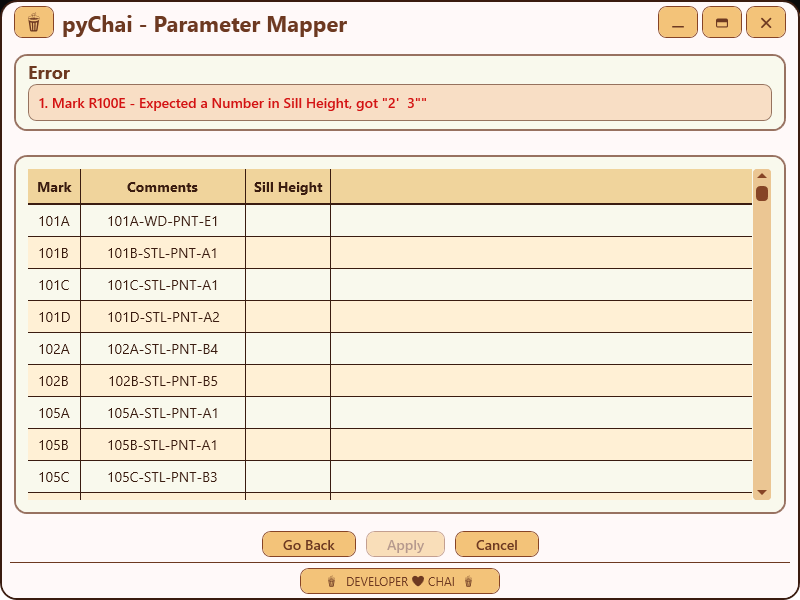 Image 13 - Parameter Mapper : Preview Window when data-validation error
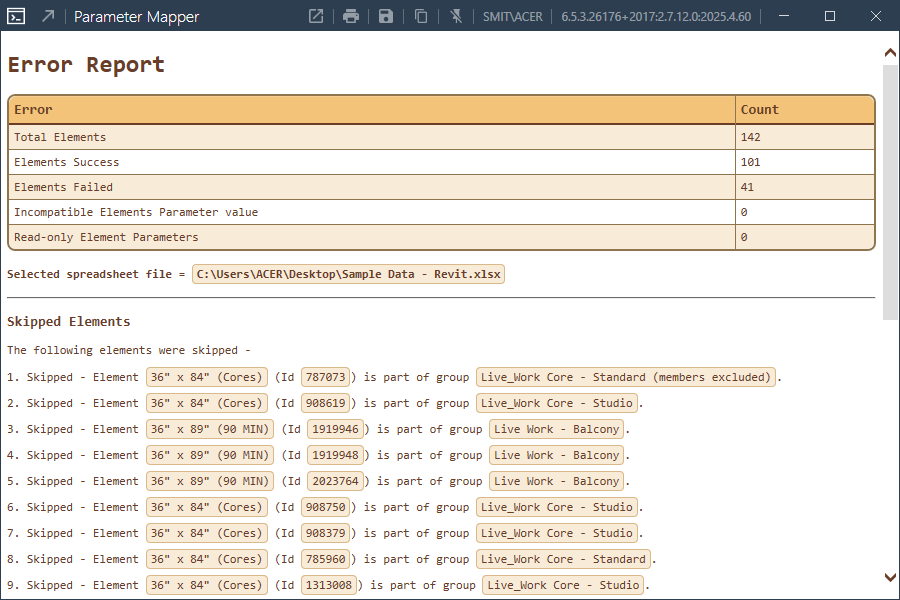 Image 14 - Parameter Mapper : Report showing the summary and errors (if found)
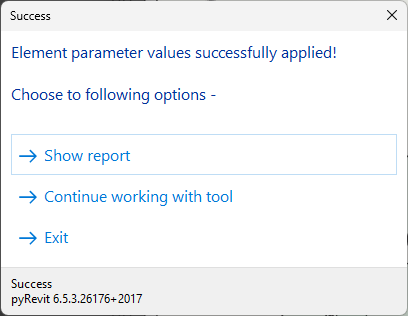 Image 15 - Parameter Mapper : Dialog box shown post completion
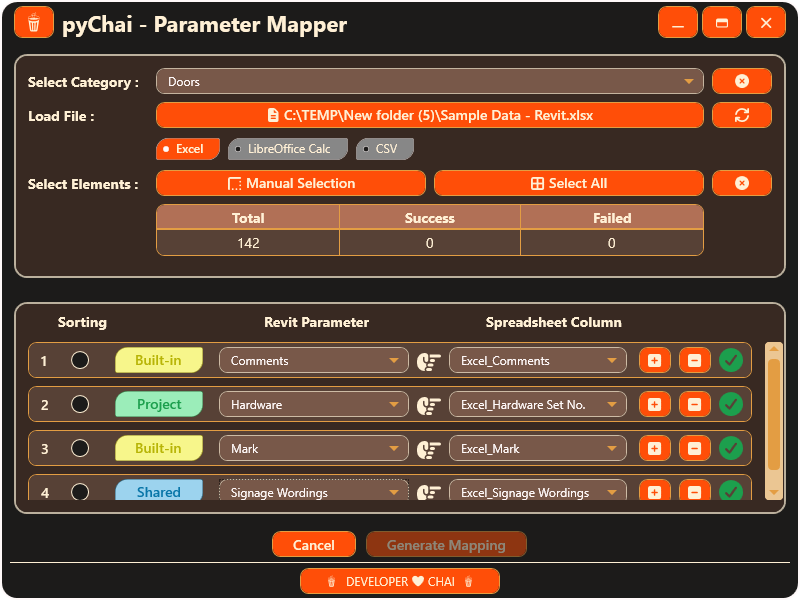 Image 16 - Parameter Mapper : Dark Mode
Notes
Here, spreadsheet file is either of these - Excel / LibreOffice Calc / CSV
IMPORTANT
- The selected row in “Sorting” column will be used as a reference for identifying elements.
- The spreadsheet file should have only one header row, with unique column header name, else it will show with suffix
.1added (doesn’t affect the tool).- The spreadsheet file should have only 1 work sheet inside the file.
- The Revit project’s units will be considered when implementing numerical values from spreadsheet file.
- The numerical values must be in digits only, not strings. Example,
2' 6"will give error,2.5(feet decimal) is valid.- The elements inside group will be ignored.
Visual Diagram
To expand image, click on “Zoom” icon on top-right part of image.
Sequence Diagram
---
title: pyChai Parameter Mapper - Sequence Flowchart
config:
  theme: custom
  themeCSS: |
    rect.rect {
      stroke: none !important;
    }
---
sequenceDiagram
    autonumber
    actor User

    box rgb(230,240,255) Main Window Operations
        participant MW as MainWindow View
        participant MWVM@{ "type": "collections"} as MainWindow ViewModel <br/> collection of multiple view models
    end

    box rgb(255,240,230) Preview Window Operations
        participant PW as Preview Window (View)
        participant PWVM@{ "type": "collections"} as Preview Window (View Model)
    end

    participant Model@{ "type": "collections"} as Revit API backend (Model)

    User ->>+ MW : Pick spreadsheet file
    MW ->>+ MWVM : Request file data
    MWVM ->>+ Model : Read spreadsheet data
    Model -->>- MWVM : Extract spreadsheet columns
    MWVM -->>- MW : Update column list
    MW -->>- User : Show available spreadsheet columns

    User ->>+ MW : Choose Revit category <br> & select Elements
    MW ->>+ MWVM : Request elements
    MWVM ->>+ Model : Query Revit elements
    Model -->>- MWVM : Extract Elements & its instance parameters
    MWVM -->>- MW : Update instance parameters list
    MW -->>- User : Show available instance parameters

    User ->>+ MW : Mapping Revit parameters to <br> selected spreadsheet columns
    MW ->> MWVM : Update mapping
    MWVM -->> MW : Checking validation status <br> of mapped elements
    MW -->>- User : Show mapping status

    User ->>+ MW : Click on "Preview" button
    Note  over  MW ,PW: MainWindow collects the mapped data, <br> passing on the data to PreviewWindow ViewModel, <br> hiding the MainWindow View in process
    MW ->>+ PW : Open PreviewWindow View
    PW ->>+ PWVM : Generate a collection of mapped data
    PWVM ->>+ Model : Validate & build data
    Model -->>- PWVM : Validated table
    PWVM -->>- PW : Binding the validated data to DataGrid
    PW -->>- User : Show PreviewWindow View, with final mapped data
    deactivate MW

    User ->>+ PW : Click Apply
    PW ->>+ PWVM : Apply values
    PWVM ->>+ Model : Applying Revit Parameter values <br> in TransactionGroup
    Model -->>- PWVM : Success / Failure
    PWVM -->>- PW : Result

    alt Success
        PW -->> User : Show outcome & options
        PW -->> MW : Close / return to MainWindow View
    else Failure
        PW -->> User : Show error message
    end
    deactivate PW
Image 17 - Parameter Mapper : Sequence Diagram
The Sequence Diagram shown above depicts the sequence flow of Parameter Mapper tool, from start of user interaction to the end of lifecycle of tool.
Pitfalls along the development
It was not a smooth-sailing journey. There were rather many frustrating moments, where I was considering abandoning the project.
- The architectural limitations of pyRevit meant I had to manually implement the WPF UI styles.
- Since I was using IronPython 2.7 with WPF, the frustration of silent bugs on WPF error, and on occasion crashing without any output, unlike Revit API bugs. It gave me majority of headache !😑
- Even though I have
UserControl, I could not use theDependancy Propertyin IronPython, due to flaky nature of WPF with IronPython. - Initially, I felt that the WPF would not be affected by changes between
.NET 4.8and.NET 8(my bad !😅). However, it presented inconvenience when testing and debugging between 2 different .NET versions. - Learning the base part in C# and implementing by translating it to IronPython is in itself a head-scratcher.
- Implementing MVVM in IronPython 2.7-WPF workflow has been challenging in some areas. There were some situations where I had to implement code-behind solutions due to limitations of IronPython 2.7. So, it was a pure MVVM implementation as I imagined.
Credits
I would like to thank the creator of pyRevit, and the team for continuously maintaining the amazing tool. Additionally, I would like to thank the following -
- Jean-Marc Couffin - For providing solutions on pyRevit forum.
- Stack Overflow - Even though Claude can provide solution, but I found the explanations insightful and more detailed.
- Countless blogs which I have referred for learning WPF XAML, specially data-binding and DataGrid.
- WPF UI - Guiding light by reading the source WPF XAML code, along with the sample Gallery app.
- pyRevit - Learning from source code.